|
|
Post by Plocket on Mar 19, 2007 18:15:07 GMT
Over the next few weeks I will be looking at clematis and detailing the different pruning groups, different types of clematis, diseases, propagating etc. If you have any questions or comments please use THIS thread. Clematis are in the Ranunculaceae family which also includes anemones, aquilegias, delphiniums, hellebores and buttercups. 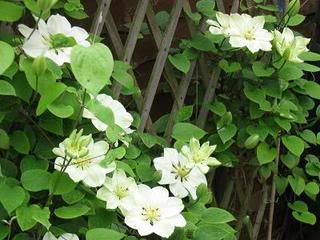 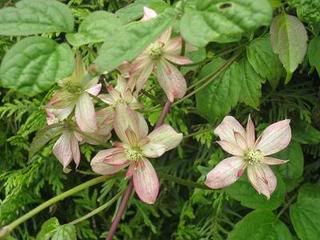 Most people, when they first think of clematis, think of the large-flowered cultivars, but clematis flowers come pretty much in every shape, size and colour. The plants too vary considerably from the hugely rampant montanas to tiny little alpine clematis which will only grow a few inches tall; plants that climb and those that don’t; evergreens and deciduous plants; those suitable for rock gardens and those suited to climb through large trees…. There is probably something to suit everyone. 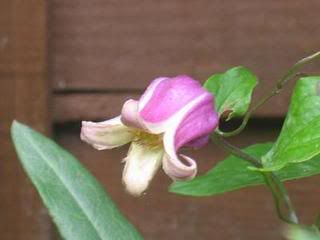 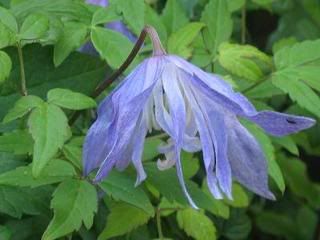 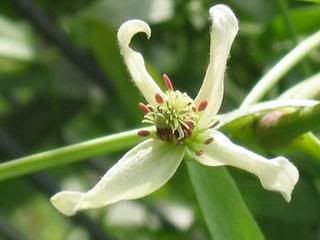 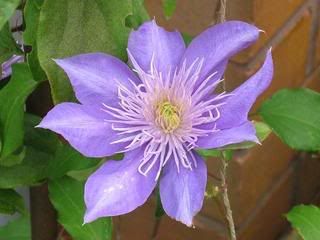 BUYING It’s a good idea to know where you are going to plant a clematis before buying so you can choose something that suits the aspect and area where it will grow. Generally they are moisture loving plants although they don’t like to be water-logged, and they aren’t particularly fussy about soil type, as long as they can get the required moisture, and lots of nutrients. There's little point in buying a montana that will grow to 25ft if you've only got a small area of fence or wall to cover, and similarly you won't be successful planting a sun-loving evergreen in a shady spot. When choosing a plant it is best to choose a strong, mature plant with lot of stems coming out of a woody framework at the base. There is nothing wrong with buying a small, young plant but it will require a lot more care until it is established, and if you decide to go for the cheaper option it is best to pot the plant up for a while until it is stronger and less susceptible to slugs and weather damage. By choosing a more mature plant it is more likely to establish and you will enjoy flowers much sooner. Ensure you select a plant that isn’t root bound or surrounded by weeds and I also look out for vine weevils in the soil. Your new clematis can be planted pretty much any time of year provided the soil isn’t frozen, but it’s best to plant in late summer or early autumn when the weather isn’t too hot and the plant can get established before winter. PLANTING Before planting, soak your new clematis, still in the pot, in a bucket of water for about twenty minutes then remove it from the pot. Prepare the site by digging a hole approximately 18" square and at least 18" deep. Loosen up the soil at the bottom of the hole and dig in some bone meal. Carefully loosen the roots taking care not to damage them, and place the plant in the hole so that the top of the root ball is about 3" below ground level. Backfill with a mixture of compost and garden soil, and if your soil is quite heavy add some sand to this mixture too. Tread the plant into the ground firmly and water well when you are finished. If your soil dries out quickly or your plant is in a position where it doesn't get much water, place an open ended pipe (approximately 2" in diameter) in the planting hole with one end close to the root ball, and the other end just above ground level. By doing this water can be poured down the pipe to reach the plant's roots where it is most needed in dry conditions. The base of your clematis should be shaded to keep the roots cool. This can be done with other plants, or a slate propped up, but remember that this will encourage slugs and snails, which are partial to clematis. CONTAINERS There are lots of varieties of clematis suitable for planting in containers. For best results choose a clematis that grows to a maximum of 10ft but more compact varieties are obviously better. Good feeding and regular watering is essential to maintain a healthy plant. You can plant more than one clematis in one container but remember that for ease of maintenance it's best to plant the same pruning groups together. Terracotta, stone, concrete or wooden containers are best as plastic can overheat the roots in summer. A pot measuring at least 18" diameter and 18" deep is best because clematis have quite long roots. The container should have good drainage so as well as holes in the bottom you should add a good layer of gravel or small pebbles, and then fill the pot with good compost (John Innes No.3 for example). Soak the new clematis, still in the original pot, in a bucket of water for about twenty minutes then remove it from the pot. Carefully loosen the roots taking care not to damage them, and place the plant in the new container so that the top of the root ball is about 3" below soil level. The roots of the plant should be shaded by planting something around the clematis, or covering with a stone. Remember though that any protection, particularly stones, will encourage slugs and snails. If your clematis becomes root bound after a few years you could root prune it. Carefully tip the plant out of the container in its dormant period and gently cut approximately 3" of the root away. Re-pot into fresh compost and add fertilizer to encourage new growth. |
|
|
|
Post by Plocket on Mar 24, 2007 19:14:28 GMT
PRUNINGPruning a clematis correctly is vital to ensure a good display of flowers. There are three main groups but if you don’t know what pruning group your clematis is in, a simple rule to remember is “if it flowers before June, do not prune”. This isn’t appropriate for all clematis, but it’s a reasonable rule of thumb. GROUP ONE - NO PRUNING The clematis in this pruning group flower on the previous seasons growth, and they all flower early in the season. No pruning is actually required for these plants but they can be tidied immediately after flowering. If you prune at any other time your clematis is unlikely to flower until the following flowering season. Group One clematis include alpinas, macropetalas, montanas, cirrhosas and evergreens – here are a few examples: Frances Rivis; Constance; Marjorie; Primrose Star 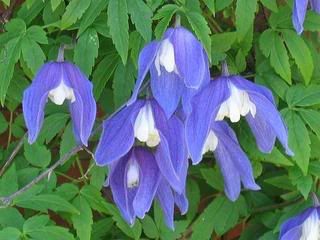 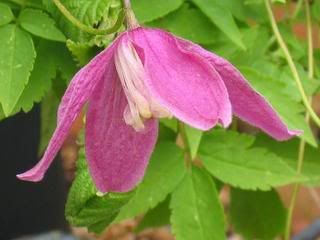 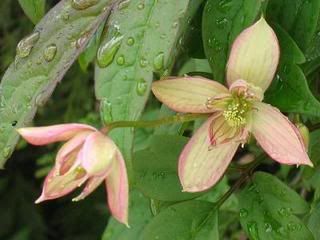 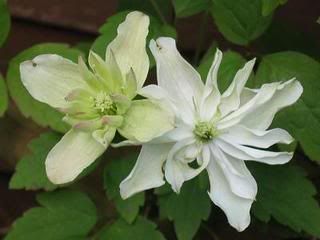 GROUP TWO - LIGHT PRUNE This group consists of all the early large-flowered hybrids, including double and semi-double varieties. Their main flowering period is May to June, and after this time you can prune your clematis back by about a third to a half of the plant, or enough to keep the plant looking neat and tidy. Start to feed the plant with a high potash fertilizer and this will encourage new growth and more flowers in the autumn. In February/March you can tidy by cutting out dead or weak stems – these are easy to recognise because there should be some good new growth by this time, and you can remove stems beyond the last leaf-bud. Silver Moon; Crystal Fountain; Belle of Woking; Guernsey Cream 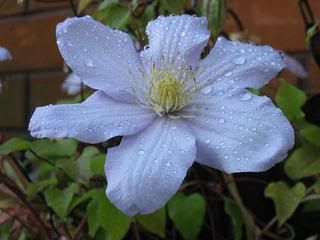  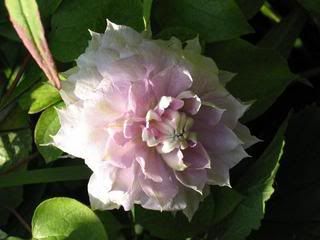 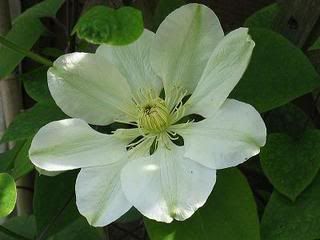 GROUP THREE - HARD PRUNE This group includes viticellas, herbaceous and large late-flowering hybrids which produce flowers on the current season's growth, and failure to prune these clematis properly may result in the plant becoming bare of leaves and flowers lower down. They can be pruned back to a pair of strong leaf buds in February/March which will normally be approximately 12" to 18" from the ground. This pruning also encourages the plant to produce new shoots from the roots creating a bushier plant. I also prune some of the longer stems back a bit more later on in the spring creating more growth and possibly extending the flowering period, but I haven’t managed to prove this yet! Etoile Violette; Hanajima; Petit Faucon; Fusca  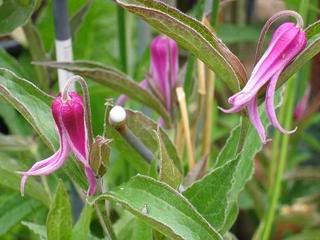 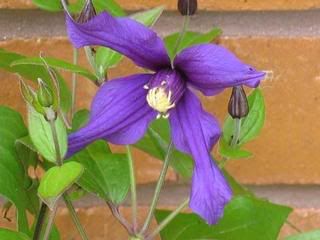 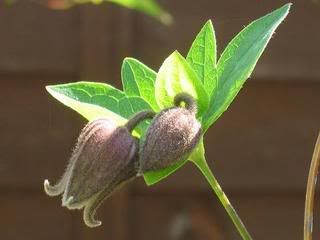
|
|
|
|
Post by Plocket on Apr 17, 2007 10:04:48 GMT
PROPAGATION
Propagating plants is always exciting, and clematis are no exception. However it should be noted that seeds don't always come true to the parent whereas taking cuttings or layering guarantees an identical plant.
PROPAGATION FROM SEED
Seeds should be collected when they are ripe, which means they are usually brown and dry, but the right time for collection depends on when the plant flowered. It's best to collect seeds in dry weather but if there has been a wet spell let the seeds dry out properly by spreading them onto kitchen paper and leaving them in a well ventilated area. Seeds should be sown as soon as possible after collection, but if this isn't possible ensure that they are dry then store carefully, remembering to label them.
Fill pots or a seed-tray with moist loam based seed compost to about 1cm below the lip of the container and firm the compost down to prevent air pockets. It isn't strictly necessary to take off the feathery style but most of the information I've read recommends it. Take care not to injure the seed and then sow it on the surface of the compost, taking care to allow space between the seeds to prevent overcrowding. Cover the seeds with a thin layer of seed compost and then cover this with a thin layer of sharp sand or grit which will help stop the compost drying out and prevent the seeds from being disturbed. Stand the pots or seed tray in a basin of general-purpose fungicide mixed into water and when the sand or grit looks damp it can then be removed. Label the seeds carefully and then place them in a cold frame, unheated greenhouse or outside in a well lit spot out of direct sunlight. Place a pane of glass over the top of the seeds which will help to retain moisture but also prevent disturbance by mice or birds. Check the seeds regularly to ensure that the compost remains moist but not wet.
Germination can take from a couple of weeks to a couple of years, but as long as the seeds are viable and in suitable conditions, the results should be good. When the seedlings begin to develop remove the glass cover and allow them to produce two to three pairs of leaves, and reach a height of approximately 6cm before you think about potting up. Late summer/early autumn is a particularly good time for potting up and if yours don't look strong enough to handle at this time it is best to leave them until spring. Ease off the watering a bit in the winter so the compost dries off a bit.
When the seedlings are ready they can be potted up into 3inch pots containing moist loam based seedling compost. Take care not to damage the stem or roots and when the seedling has been pressed into the compost firmly you can label it and push a thin cane near to the little plant. Once again the seedlings should be kept in a bright spot in the garden or an unheated greenhouse, out of direct sunlight and be sure to protect them from slugs and snails. As the seedlings grow you can pinch out the growing tips to encourage the plant to bush out, and tie in new growth to the cane. Ensure that the compost is kept moist at all times, but not waterlogged.
Once the plants have established good root systems they can be potted up again into larger pots, again with loam based compost. Allow the plants to grow in containers until they are well established with strong stems before you consider planting them out in the garden.
PROPAGATION BY LAYERING
Layering is a simple and natural form of propagation where a shoot is encouraged to root while still attached to the parent plant. Late spring/early summer is a good time to attempt layering and you'll need to decide whether you are going to do it direct into the ground or using pots. Whichever method you choose you will need to choose a strong flexible stem which can be bent to the ground.
If you are layering direct into the ground you will need to prepare a shallow trench, and fill it with organic compost mixed with your soil, and also add some grit or sharp sand. If you are using pots you will need to fill them with a mixture compost and soil as mentioned above, or John Innes No.3 is good too. Trim off the leaves of alternate leaf joints of the chosen stem, then make a small cut about 1cm below and in the direction of each of the trimmed leaf joints, but be careful not to cut through the stem. Dust each of the cuts with hormone rooting powder and then peg the stem and trimmed joints into the soil of the trench or onto the surface of your pots with one trimmed leaf joint per pot. Leave the last few leaf joints of the stem untrimmed and tie it to a cane in a suitable spot beyond your trench or pots. Water the parent plant and the trench or pots and protect with chicken wire or something else that will prevent damage from animals and birds. Water the trench or pots regularly, and continue to water and feed the parent plant as usual.
The layers will need to be left for about a year to ensure they start growing roots, and then you can cut them from the parent plant. Carefully pot up the newly created plants using loam based compost, and label carefully. Keep the plants well watered and protect from slugs and snails.
PROPAGATION FROM CUTTINGS
You can use softwood or semi-ripe cuttings, softwood being the youngest, greenest part of a growing stem. Cuttings can be taken from spring to summer and take approximately five weeks to root. Semi-ripe cuttings use partially ripened stems and are taken from midsummer to early autumn and take a bit longer to root.
The most usual cutting taken for clematis propagation is an internodal cutting, which means that the cut is made between two leaf joints/nodes. Some clematis take better than others but it's fun to try and see what you can achieve.
Fill your pots with loam based seed compost and firm it down, topping off with grit or sharp sand. Water with general purpose fungicide diluted as appropriate in water, and allow to drain. Select a stem from your clematis and cut it about 50cm from the tip, directly above a leaf joint. Looking at the stem, make your first cut midway between two leaf joints, then allow two more leaf joints and cut 1cm after the second one, so that you have two pairs of leaves. Cut off the bottom two leaves, and one of the upper leaves, then dip the cutting into a fungicide solution and allow to drain. If using semi-ripe stems it's a good idea to dip the tip into hormone rooting powder, but softwood cuttings take more easily. Push the cutting into the compost until the upper leaf joint is just above the surface. Label your cuttings carefully and water with a fine spray to avoid the cuttings moving about. Place the pots in a propagator or seal inside a plastic bag. Bottom heat in a propagator helps but isn't absolutely necessary. Keep the cuttings in a bright position but out of direct sunlight, and don't allow the compost to dry out.
To check whether your cutting has rooted, carefully pull on the leaf - if it moves give the cutting longer to take. When you are sure the cuttings have rooted you will need to harden them off gently and eventually have them outside.
Pot up into loam based seedling compost but bury the original leaf joint under the surface of the compost, allowing just the new growth to show - this will encourage the production of new roots on the new growth. When the plant reaches about 30cm tall, prune it back to just above the first set of leaves showing above the compost, and this will encourage new side shoots. Then let the plant grow another 30cm or so, and prune back to the second set of leaf joints, creating a bushier plant at the base. Ensure that the compost stays moist at all times.
|
|
|
|
Post by Plocket on Apr 27, 2007 11:19:04 GMT
PESTS AND DISEASESExcept for Clematis Wilt, clematis are no more prone to disease than any other garden plant. If you are careful how you plant and care for your clematis it will grow to be healthy and vigorous, and capable of surviving many pests and diseases. I've listed some of the most common pests and diseases which may afflict clematis. APHIDS Greenfly and blackfly can attack clematis particularly during spring and summer, and as with any plant, heavy infestations can stunt the growth of your plant. They can also spoil the foliage with "honeydew" and then black sooty mould can form. Check your plants regularly and treat accordingly. EARWIGS are particularly partial to clematis buds but will also attack flowers and leaves. They hide during the day and can be trapped by providing nesting places: place a small terracotta plant pot upside down on the top of a cane, as close to the flowers as possible, and fill it with straw or crumpled newspaper. In the morning the contents of the pot can be shaken out and the earwigs destroyed. You can also try putting grapefruit skins edge down on the ground to provide a cool hiding place. If the infestations are heavy there are sprays available on the market. SLUGS & SNAILS will damage soft young shoots of clematis, particularly the herbaceous clematis as they push out new shoots in spring, and also rasp off the outer layer of more mature stems. They will hide under rocks and slates so be particularly vigilant if this is how you shade the roots of your clematis. Mulch around your clematis with sharp sand or egg-shells (baked slowly then crushed), and put copper tape around canes and supports where possible. Garlic pellets are available as an alternative to "blue" slug pellets. Home-made sprays of instant coffee work reasonably well but will need to be repeated regularly, particularly after rain. I’m experimenting with “garlic water” at the moment and will hopefully have some positive results soon. 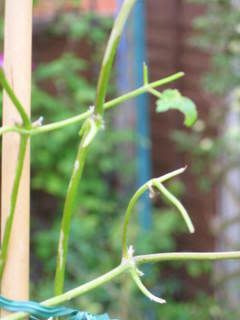 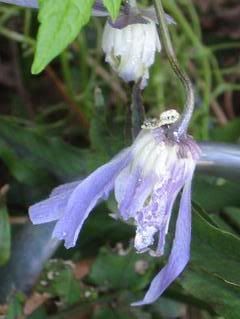 VINE WEEVIL VINE WEEVIL is another nocturnal pest which will munch the leaves of clematis, but the biggest threat is from the larvae that hatch from eggs laid on the surface of the soil. The bugs burrow into the soil and eat the roots of the plant, usually killing it if the soil remains untreated. Container plants in particular are vunerable because the larvae can't move on to other areas, and I tend to water pesticide into my pots as a precaution rather than waiting until I spot damage. Nematodes are also available to act against Vine Weevil. SLIME FLUX is caused by a bacteria that lives on the surface of bark and enters the plant when damaged. In spring the bacteria multiply and in some occasions will be forced out of wounds with the plant sap, creating a foul smelling mass of slime. This slime can also attract insects which will cause more damage to the plant. The plant above the wound usually dies but if it is pruned back hard below the affected area it might re-grow. There isn't a chemical treatment available for Slime Flux. POWDERY MILDEW affects some clematis more than others, and a lack of water to the root system is one of the main causes. It is a white fungus which forms on the leaf, flower and stems of plants making them look as though they are covered in talcum powder, and then causes a brown or purple discolouration of the leaves. Although it doesn't usually kill plants, it is unsightly and can be treated fairly easily. Spray an affected plant the following year with an appropriate fungicide before the mildew re-appears, and it is recommended that you do this regularly, using different brands each time, so that the plant can't build up an immunity to the spray. CLEMATIS WILT is a disease that can affect some early-flowering large-flowered hybrids, whereas many of the smaller flowered species and cultivars are more resistant. The spores of Phoma Clematidina are produced on dead tissue and dispersed in water or by insects. They usually affect the leaves or stems and the infection will spread rapidly down the stem causing it to blacken, causing the plant above the affected area to wilt and collapse. The clematis can often be saved by cutting back the affected stem or stems below the affected area down to the base of the plant. DO NOT put the affected stems onto your compost heap because the fungus can survive for many months. It should also be noted that if your clematis does show similar symptoms it is more likely to be caused by other things such as lack of water, damage by ants or mice to the roots or even wind damage. There isn't a product on the market to treat Clematis Wilt.
|
|
|
|
Post by Plocket on May 15, 2007 9:14:42 GMT
FEEDING
Clematis are very hungry plants, for water and food, but it's sometimes difficult to know when and what to use.
I feed all my clematis in spring and one of the most natural products you can use is well-rotted manure, as this will release nutrients slowly through the growing season, and also help retain moisture around the plant. Remove a layer of soil from around the plant, and mix this soil in with the manure before placing around the base of the plant. This can also be done in the autumn to provide nutrients through the winter, and you can also use your home-made compost or leaf mould, but don't use anything too acidic.
Liquid fertilizers are also good especially for a "quick fix" - tomato or rose fertilizer are both good as they are high in potash, and another good more natural feed to use is liquid seaweed. Don't apply this type of feed late in the summer as it will stimulate new and therefore soft growth which will get damaged in winter.
Powdered fertilizer like Blood, Fish & Bone is also recommended but remember to water it into the soil if you don't dig it in.
Container grown clematis require more regular feeding because there is a limited supply of nutrients within the soil and they can't send roots beyond the confines of the container. You can feed them once a fortnight with a diluted dose of liquid feed, or once a month with a full-strength dose. Begin feeding just before the growing season starts and continue until mid-summer. It is also a good idea to try and remove some of the top soil around the plant, and replace it with fresh compost, or even mix some well-rotted manure into the soil prior to replacing it, as mentioned above.
Clematis should be watered regularly, particularly through a dry summer, and it's better to water them a little every day rather than a lot once a week. A good mulch around the base of the plant will also help to retain moisture.
|
|
